Configure your Workspace
Accessing Cloud9 Workspace
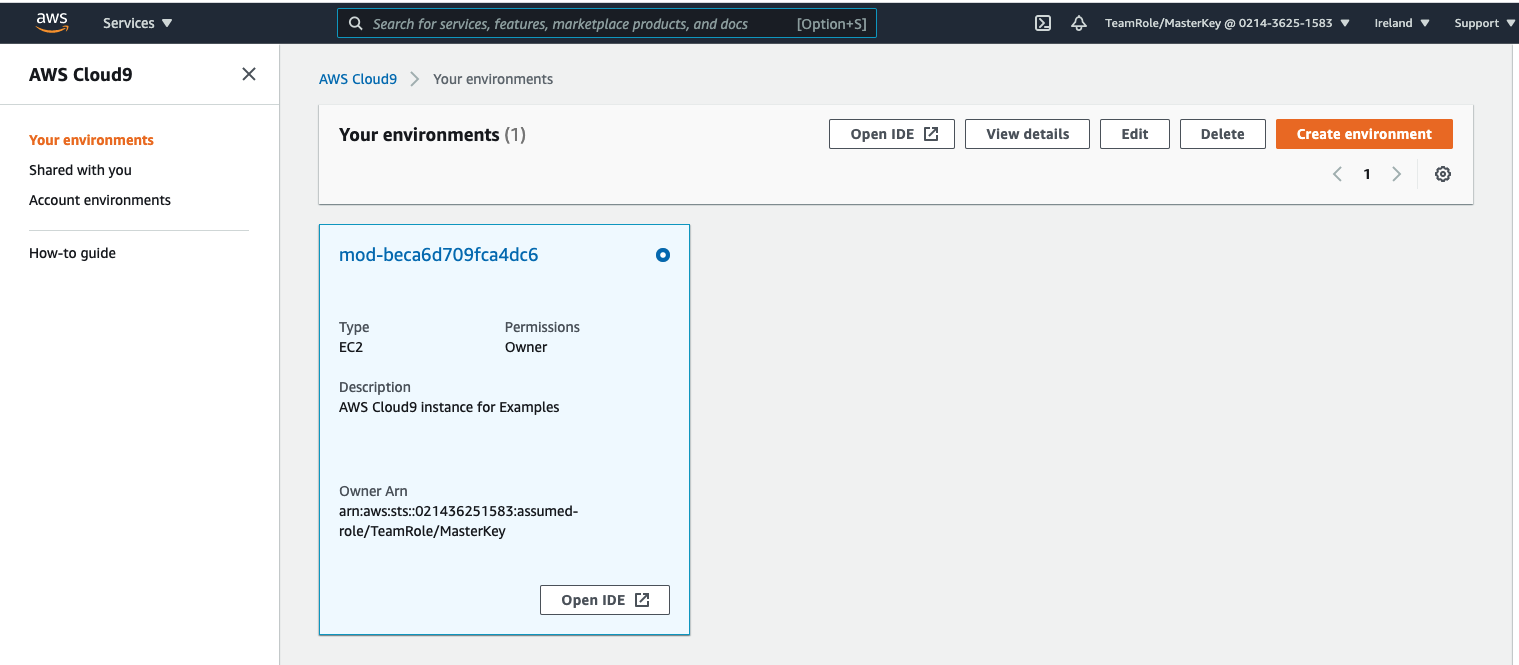
Go to the Cloud9 console and select the workspace that was created for this workshop. When running at an AWS event it will come up with a name such as mod-XXXXXXXXXXXXXXXX. Click on Open IDE
Once in you should get the familiar look and feel of IDE’s. With a file navigation panel on your left hand side, an Editor on the top right panel and a terminal on the bottom right panel. We will use the terminal and in some cases the editor.
Cloud9 normally manages IAM credentials dynamically. This isn’t currently compatible with the EKS IAM authentication, so we will disable it and rely on the IAM role instead.
Configuring Workspaces credentials
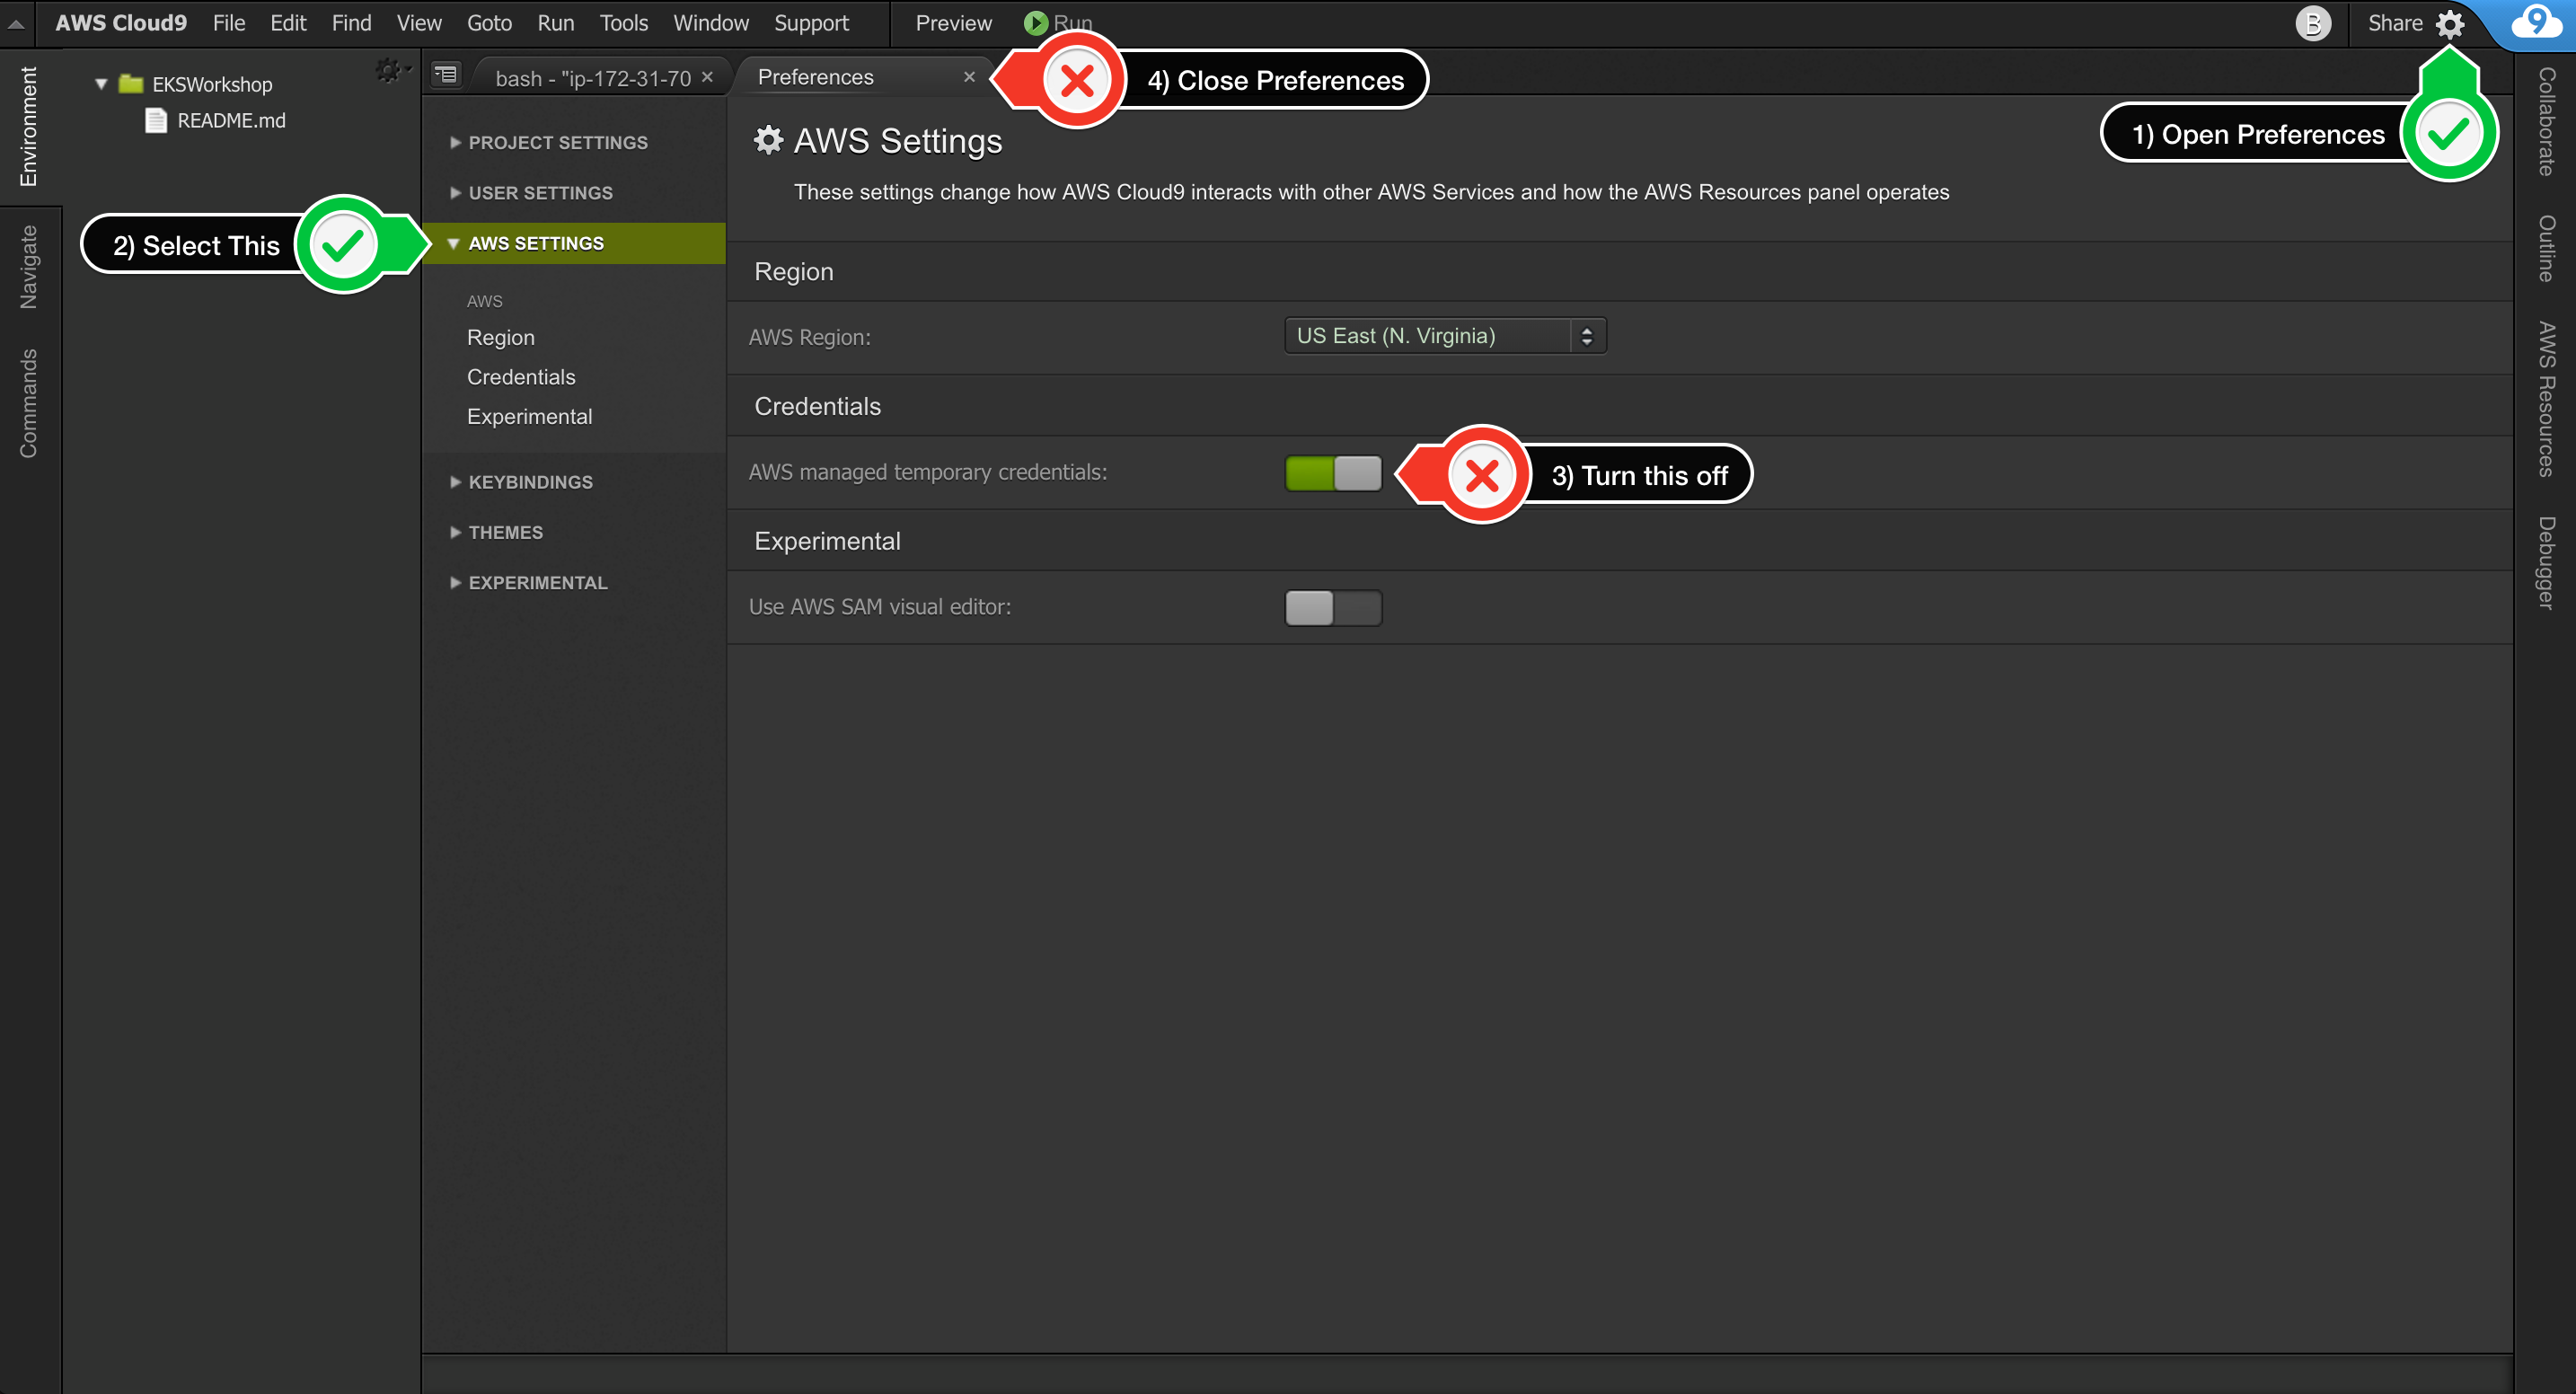
- Return to your workspace and click the sprocket, or launch a new tab to open the Preferences tab
- Select AWS SETTINGS
- Turn off AWS managed temporary credentials
- Close the Preferences tab
To ensure temporary credentials aren’t already in place we will also remove any existing credentials file:
rm -vf ${HOME}/.aws/credentials
Validate the IAM role
Use the GetCallerIdentity CLI command to validate that the Cloud9 IDE is using the correct IAM role.
aws sts get-caller-identity
Validating the IAM Role when running at an AWS event
The output assumed-role name should contain:
TeamRole
If the Arn contains the role name from above and an Instance ID, you may proceed.
{
    "Account": "123456789012",
    "UserId": "AROA1SAMPLEAWSIAMROLE:i-01234567890abcdef",
    "Arn": "arn:aws:sts::216876048363:assumed-role/TeamRole/i-0dd09eac19be01448"
}
Validating the IAM Role when running on your own
The output assumed-role name should contain:
htc-worskhop-admin
If the Arn contains the role name from above and an Instance ID, you may proceed.
{
    "Account": "123456789012",
    "UserId": "AROA1SAMPLEAWSIAMROLE:i-01234567890abcdef",
    "Arn": "arn:aws:sts::123456789012:assumed-role/eksworkshop-admin/i-01234567890abcdef"
}